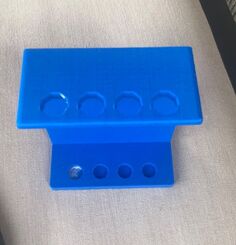
The Toothbrush Holder
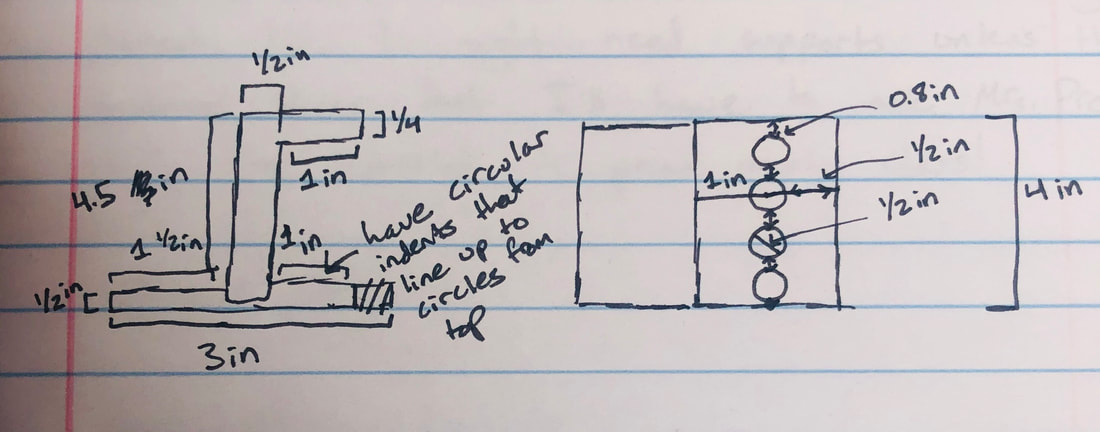
For an individual 3D project we had to choose one of four projects for the 3D printer. The one that I was super excited about was the toothbrush holder, I don't really have a need for any phone stand. I knew right away that I wanted the holder to represent function over fashion. I also wanted something sleek and used up little space. One of the original problems I encountered was figuring out how wide the holes should be to fit a range of toothbrushes, and how to have them stop from sliding out. I decided on something less than 1 inch because if you have a toothbrush that is more than 1 inch wide odds are that it's electric and you already have a stand for it. The indents on the bottom were the hardest to design on Inventor because they weren't the easiest spot to see. Luckily, I simply had to make the diameter of the circles smaller . I made measurement changes to the final design which I'll mention here.
- The bottom is now 3.5 in. instead of 3 in.
- The over hanging section (where the toothbrushes are inserted) is 1.5 in. long instead of 1 in. (This reflects on the parallel section below it)
- The height of the bottom section is 1/4 in. instead of 1/2 in.
- Distance from circles to right edge is 1/8 in. instead of 1/2 in.
- The entire top section ended up being 2 in. in width
|

|
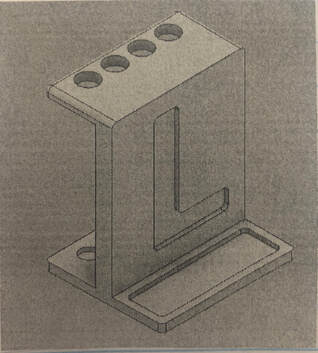
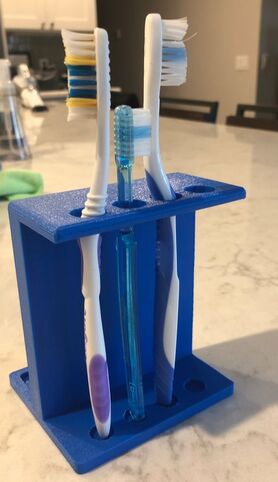
Notice: original photos of my digital version of the item are on a different computer at school (can't go there right now) so photos will be very limited. Luckily, I was able to take a picture of the screenshots we had to put into our journals. As you can see, I removed the "L" on the back, I didn't like it.
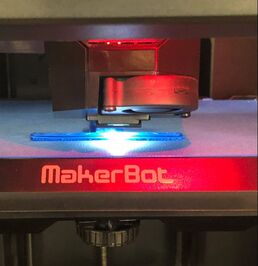
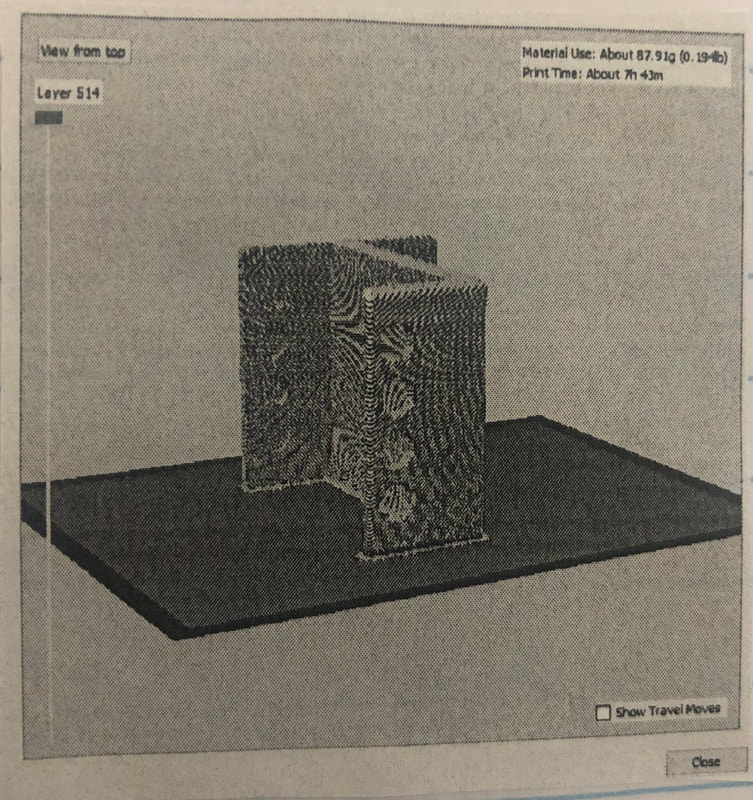
Making this thing is easiest if you start with the side view and then do the top part. You can still make the indents on the bottom from the top view, simply match up the center of the circle you're creating with the circles on the top. I hope you can understand what I was trying to say there. Otherwise, you can refer to my sketch up at the top for any measurements, keeping in mind the edits I made. I also did the "filet" option to round some of the corners to make it look not as judging. I would suggest doing filets but that is really up to you, at the end of the day it's going to be your toothbrush holder, I already have mine. ;) Afterwards, you'll want to send it to makerbot, check that you print it on its side so that you don't need any supports and the main thing you need to make sure in settings is that it's "Extruder +". When 7 hours and 30 minutes pass by (no I'm not kidding, that's how long it took to print) you can confidently bring your toothbrush holder home! |
Summary
Honestly, don't forget to have fun. That's my main piece of advice. Have confidence in the 3D printer, I really doubted it could print this thing but it did! You should be bold and daring, pushing your mind further and unleashing your wacky imagination. I really didn't know I could crank this out I mean just last year I was learning to make a cube on inventor and here I am now making somewhat complex items! I'm excited for years to come to see what I can do, and I wish for you to realize it too. You can make your weird, awesome, complex things into reality, you simply need to keep building your experience. As always, have fun creating.
