What is Inventor?
Autodesk Inventor is a "computer-aided design" or CAD software. You design parts, that you can then print into reality! Yep, a 3D printing design software. You can make parts to put into an assembly, you can then program your assembly to show what it will do! An example would be designing the different parts of a golf club and a golf ball. In an assembly, you can put together your golf club and add in the ball. Finally, you program your golf ball to swing at a certain angle, and hit the ball, sending it flying! Then, if you want, print that awesome golf club. You get it?
Widget Project
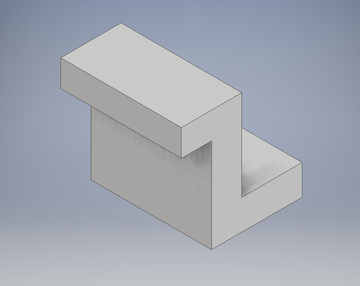
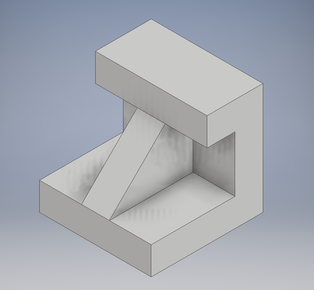
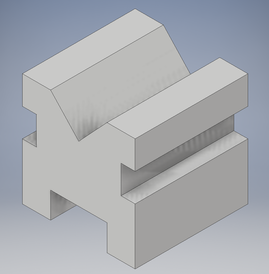
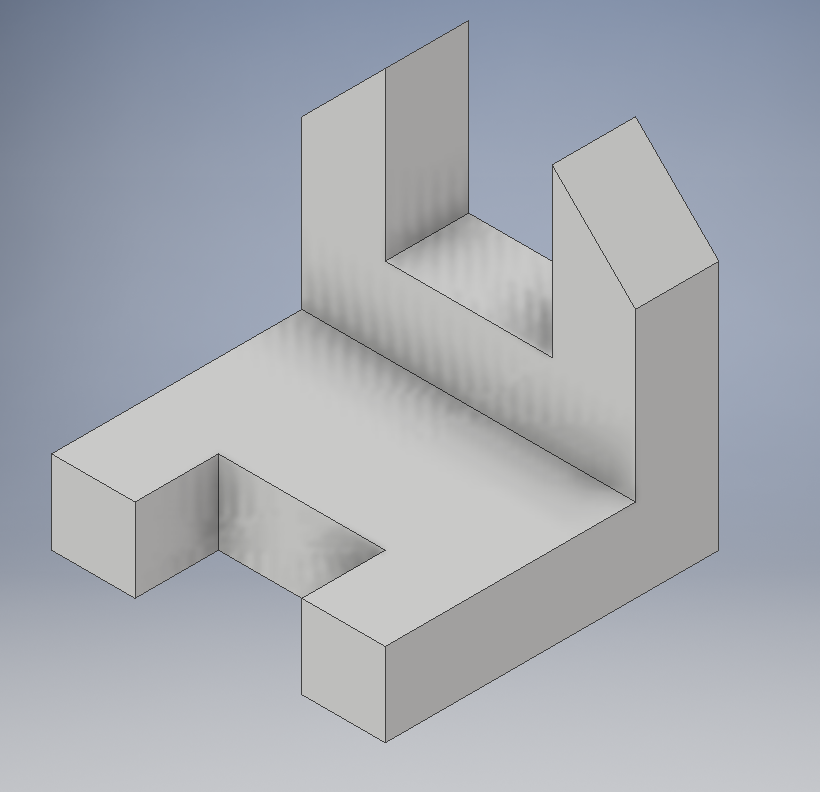
For this project, we got six widgets to design in Inventor, each with it's own challenges. We also had to limit the number of sketches we made. I personally had lots of fun warming up again to Inventor after spending a whole summer away from the software. Below are the finished widgets and a step-by-step if you want to try designing a widget!
|
|

|
|
|
|
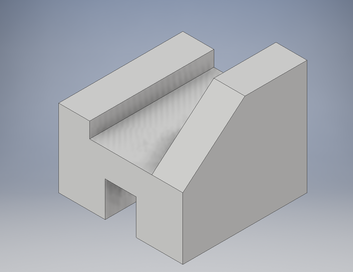
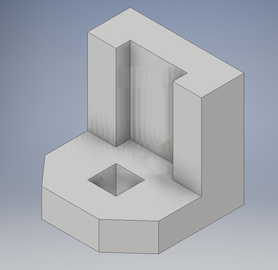
Widget 5 , the Step-by-Step Process

Conclusion - Final Thoughts |
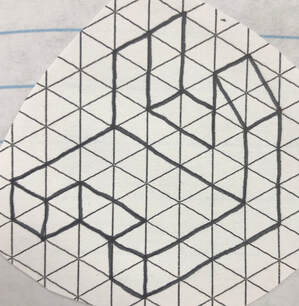
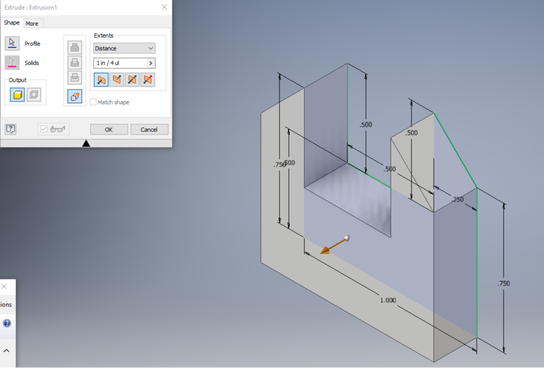
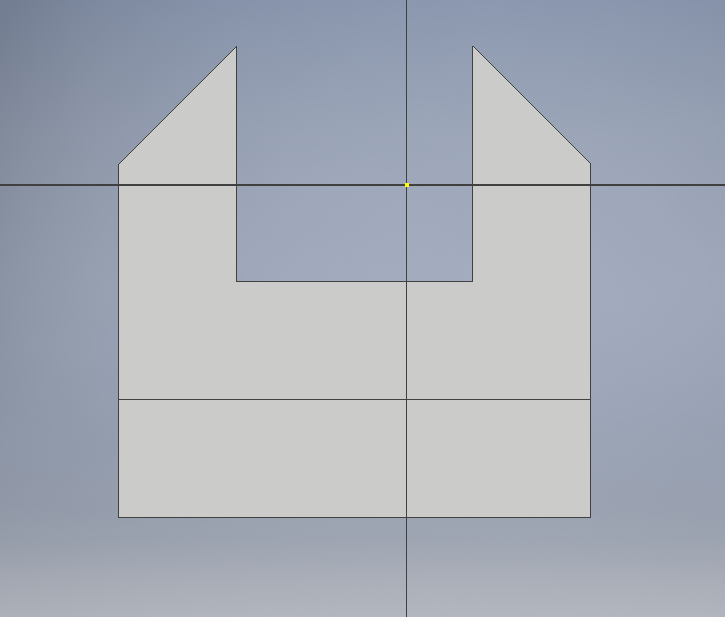
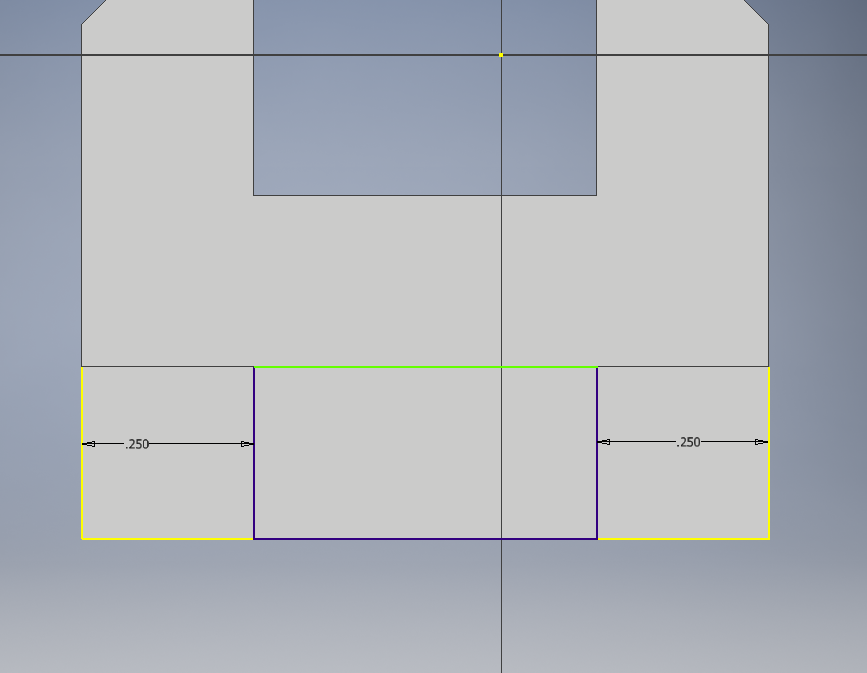
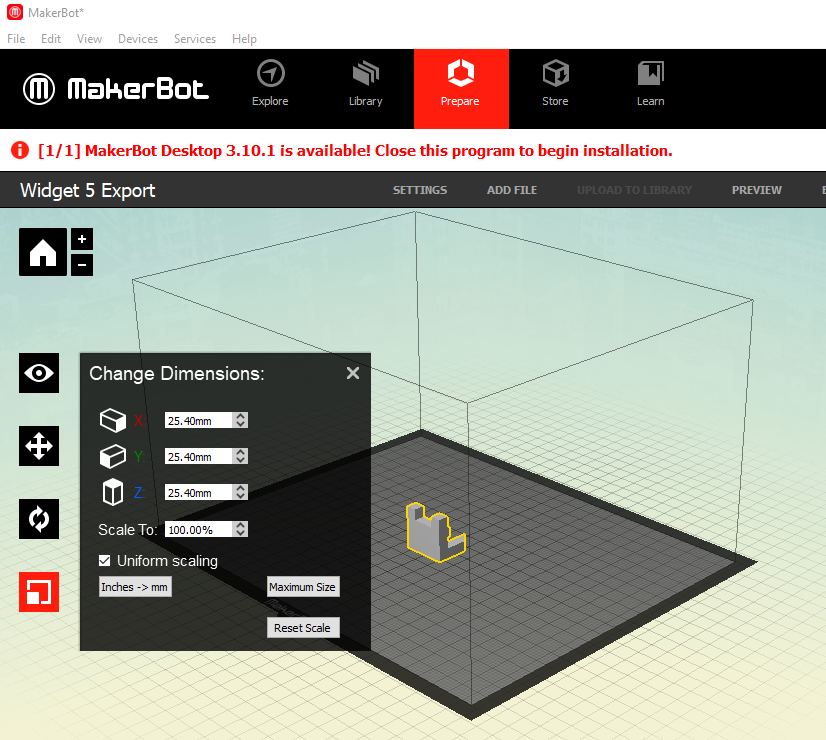
1. For this widget I had to draw a sketch, which doesn't mean you need to make the lines perfect and neat. Instead it's a way for you to visualize how it will look, each triangle representing 1/4 of an inch
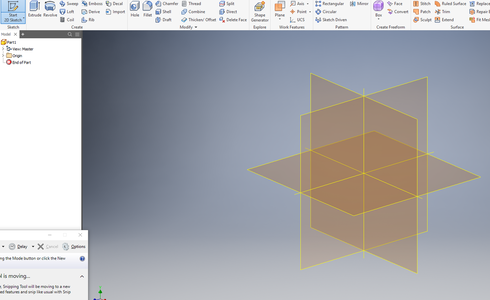
2. Once you have a visual log onto Inventor and...
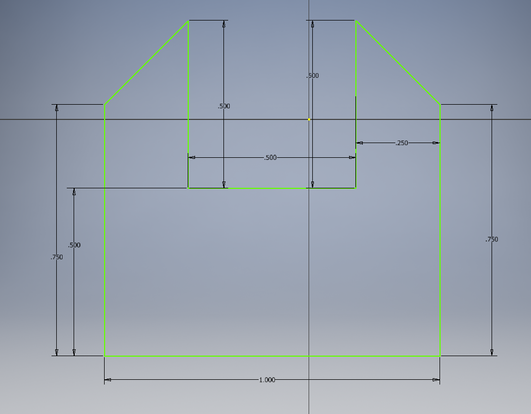
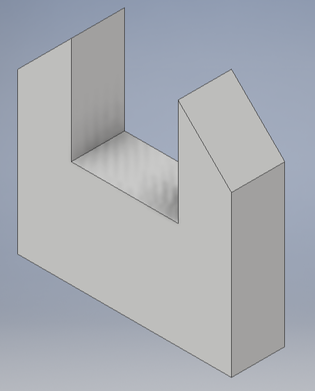
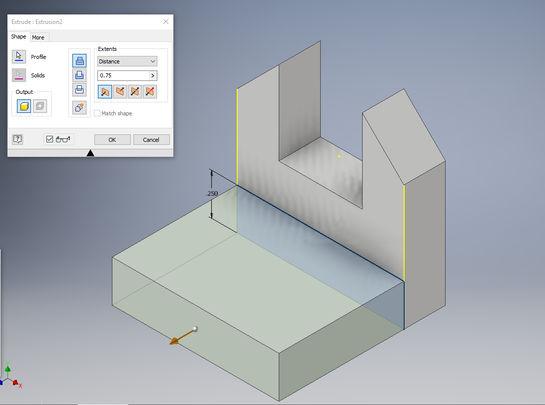
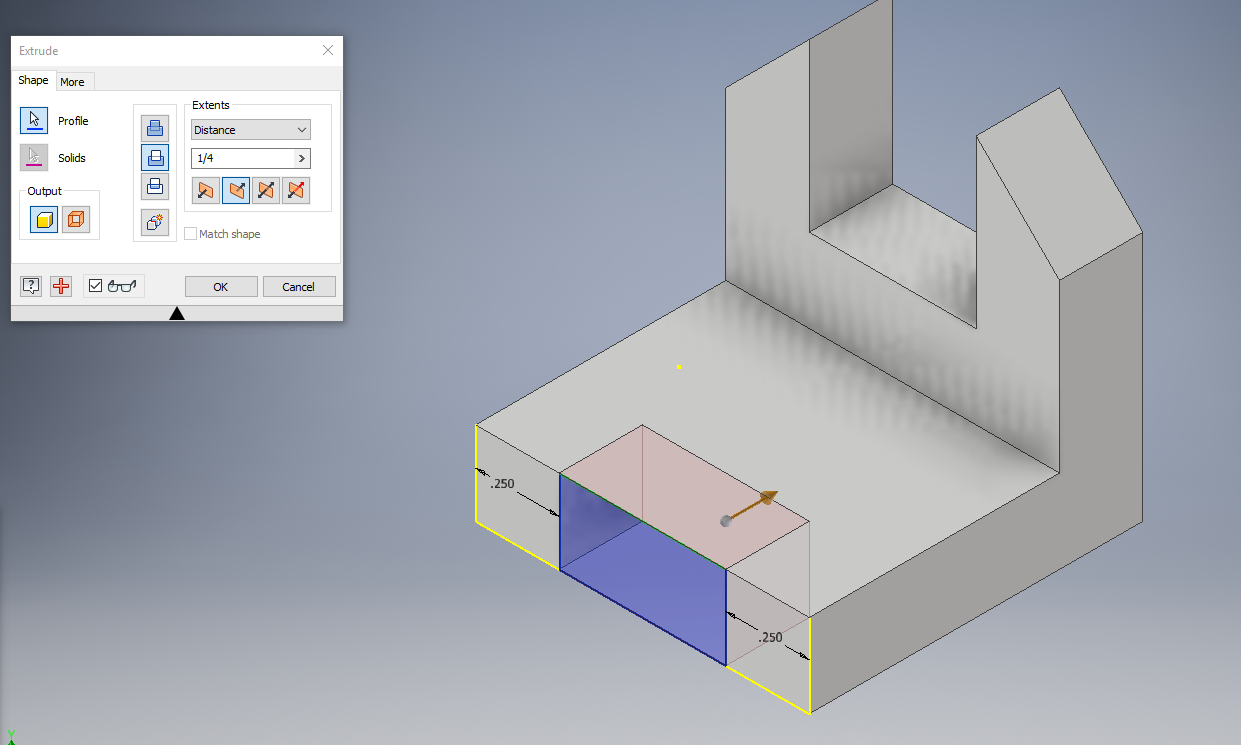
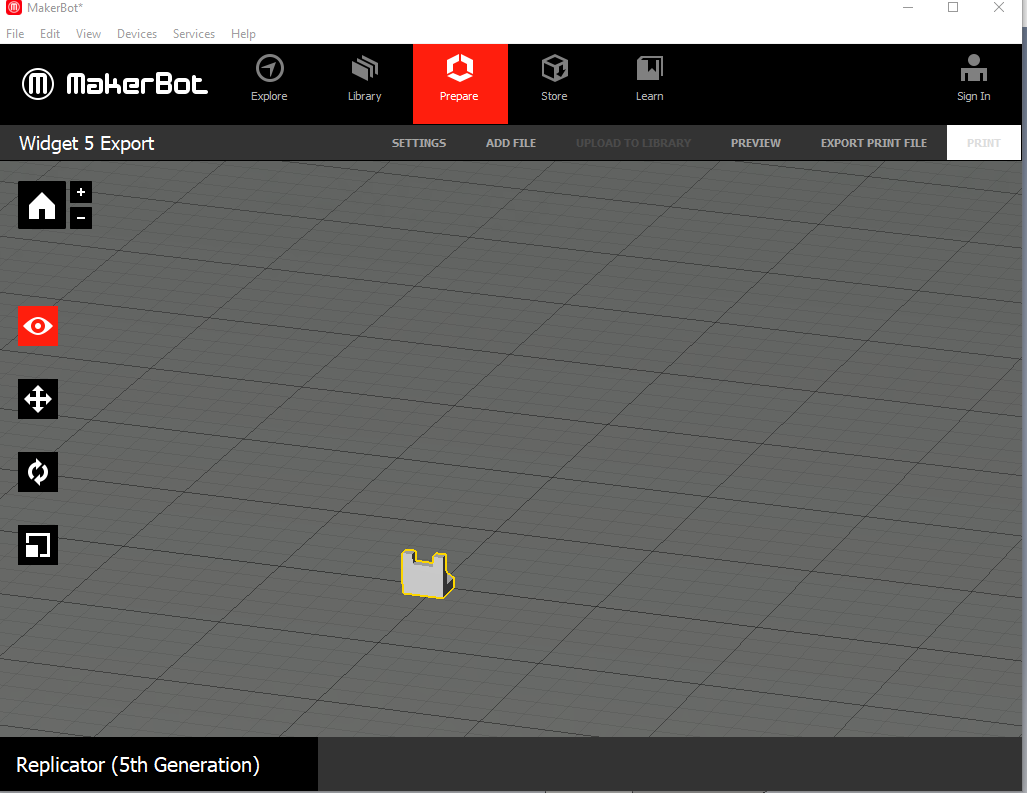
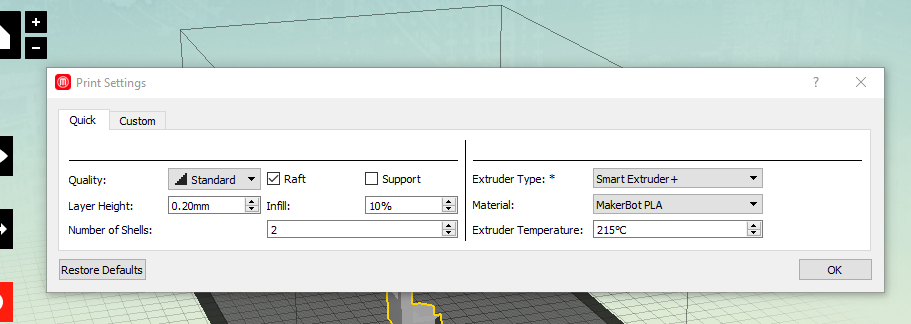
3. This may vary for your own widget but if you are replicating widget 5 specifically here is what you need to do. Choose the line option on the tool bar and draw the approximate shape of the widget. Next select the dimension option in the tool bar and follow the specific dimensions in the picture at the left. Luckily most of it is easy 1/4 intervals. 4. Once you're done with that you can hit "finish sketch" and hit the extrude button on the far left of the tool bar. You will be extruding 1/4 inch, so go in the space under "distance" tab on the right and you can either put in 1/4 or 0.25. Either way you get the same output. 5. You're not done yet though (obviously)! You will want to once again hit "start 2D sketch" and click the front of the shape. There is an actual front! You can find out on the little cube on the front right what the front is. 6. You're going to create a rectangle that is 1/4 in height and locked onto the shape. Click "finish sketch" 7. You then extrude it 3/4 of an inch. As you can see I put it in as 0.75, put 3/4 still works. 8. You are going to start another sketch that this time is on the rectangle. I'll say it again, CLICK ON THE RECTANGLE, that way you know you're sketching on it. 9. You will create another rectangle that is right on top of the one we already extruded. You will then center this rectangle 1/4 inch away from each end like the picture at left illustrates. 10. You will extrude that smaller rectangle but instead you will make it cut into the shape. You do this by clicking the 2nd button from the left below where you put in the length of extrusion. It's the button highlighted blue on the right side. You will cut it 1/4 of an inch. 11. You're done! Or are you? Sure you have the shape but you don't just want to look at it, you want to print it! Let's get to that. Up in the file tab, you will want to hit the export file button and save it as a STL file. 12. Open the MakerBot software, go to the prepare tab and click "add file" where you can then open up your widget. It will ask you if you want to rescale it, don't. You can rotate the object (third button down) so that it's in the easiest position for the machine to print it. The ideal position is without supports, and this print won't need supports. 13. You will also want to change the scale. Go down to the red button from the left picture and where it says "scale to" you will put in 1000% where it says 100% because then your widget will be the correct size. Don't forget to go back to the rotating section and say "lay flat". 14. Clicking on Settings you will want to make sure the Extruder type is Smart Extruder + (I mean, it might be different for you at home but if everything is the same, then this will be the right one) this should be the only thing you need to change. 15. Click Export Print File and save it in a flash drive, a print preview like the photo at left will show up. Using the slider you can see how the 3D printer is going to print the widget! It's awesome to double check and make sure it's printing right. After clicking OK you are good to go ahead and print! 16. If you're 3D printer is anything like ours... the prompts are pretty easy to follow and I'm sure you can figure out how to print it. It'll take a while to warm up but afterwards it really starts going. The end result will be your shape! Alright, now go out there and print! |
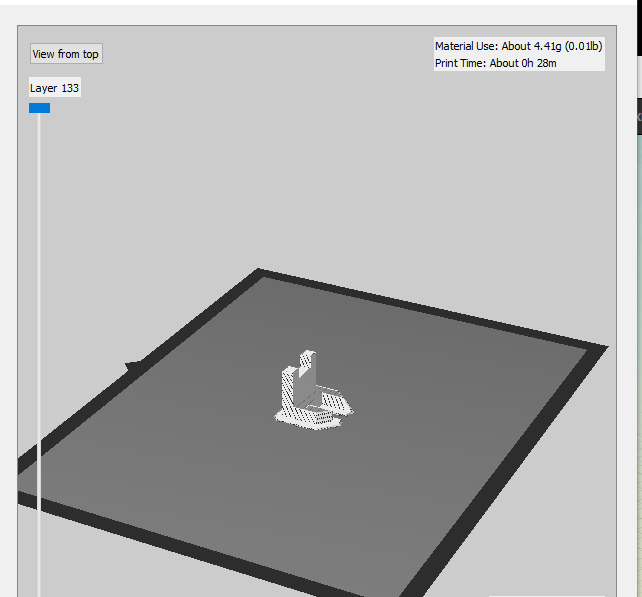
If you looked at this process and thought, "that looks fun!", you're right. Inventor is an amazing place to unleash your imagination and thanks to programs like MakerBot you can make that reality. The only thing I stress is patience, and don't rush. It's not shown here but I messed up in the middle of designing widget 5, I messed up the height big time. I caught it before I uploaded it luckily. Also, I had to upload my file twice before the 3D printer took it because something went wrong when sizing it. The term in IDEA class is that it "phantomed" me. These reasons are why you need to be patient and look over everything once in a while, it won't hurt. Have fun creating my fellow inventors!
